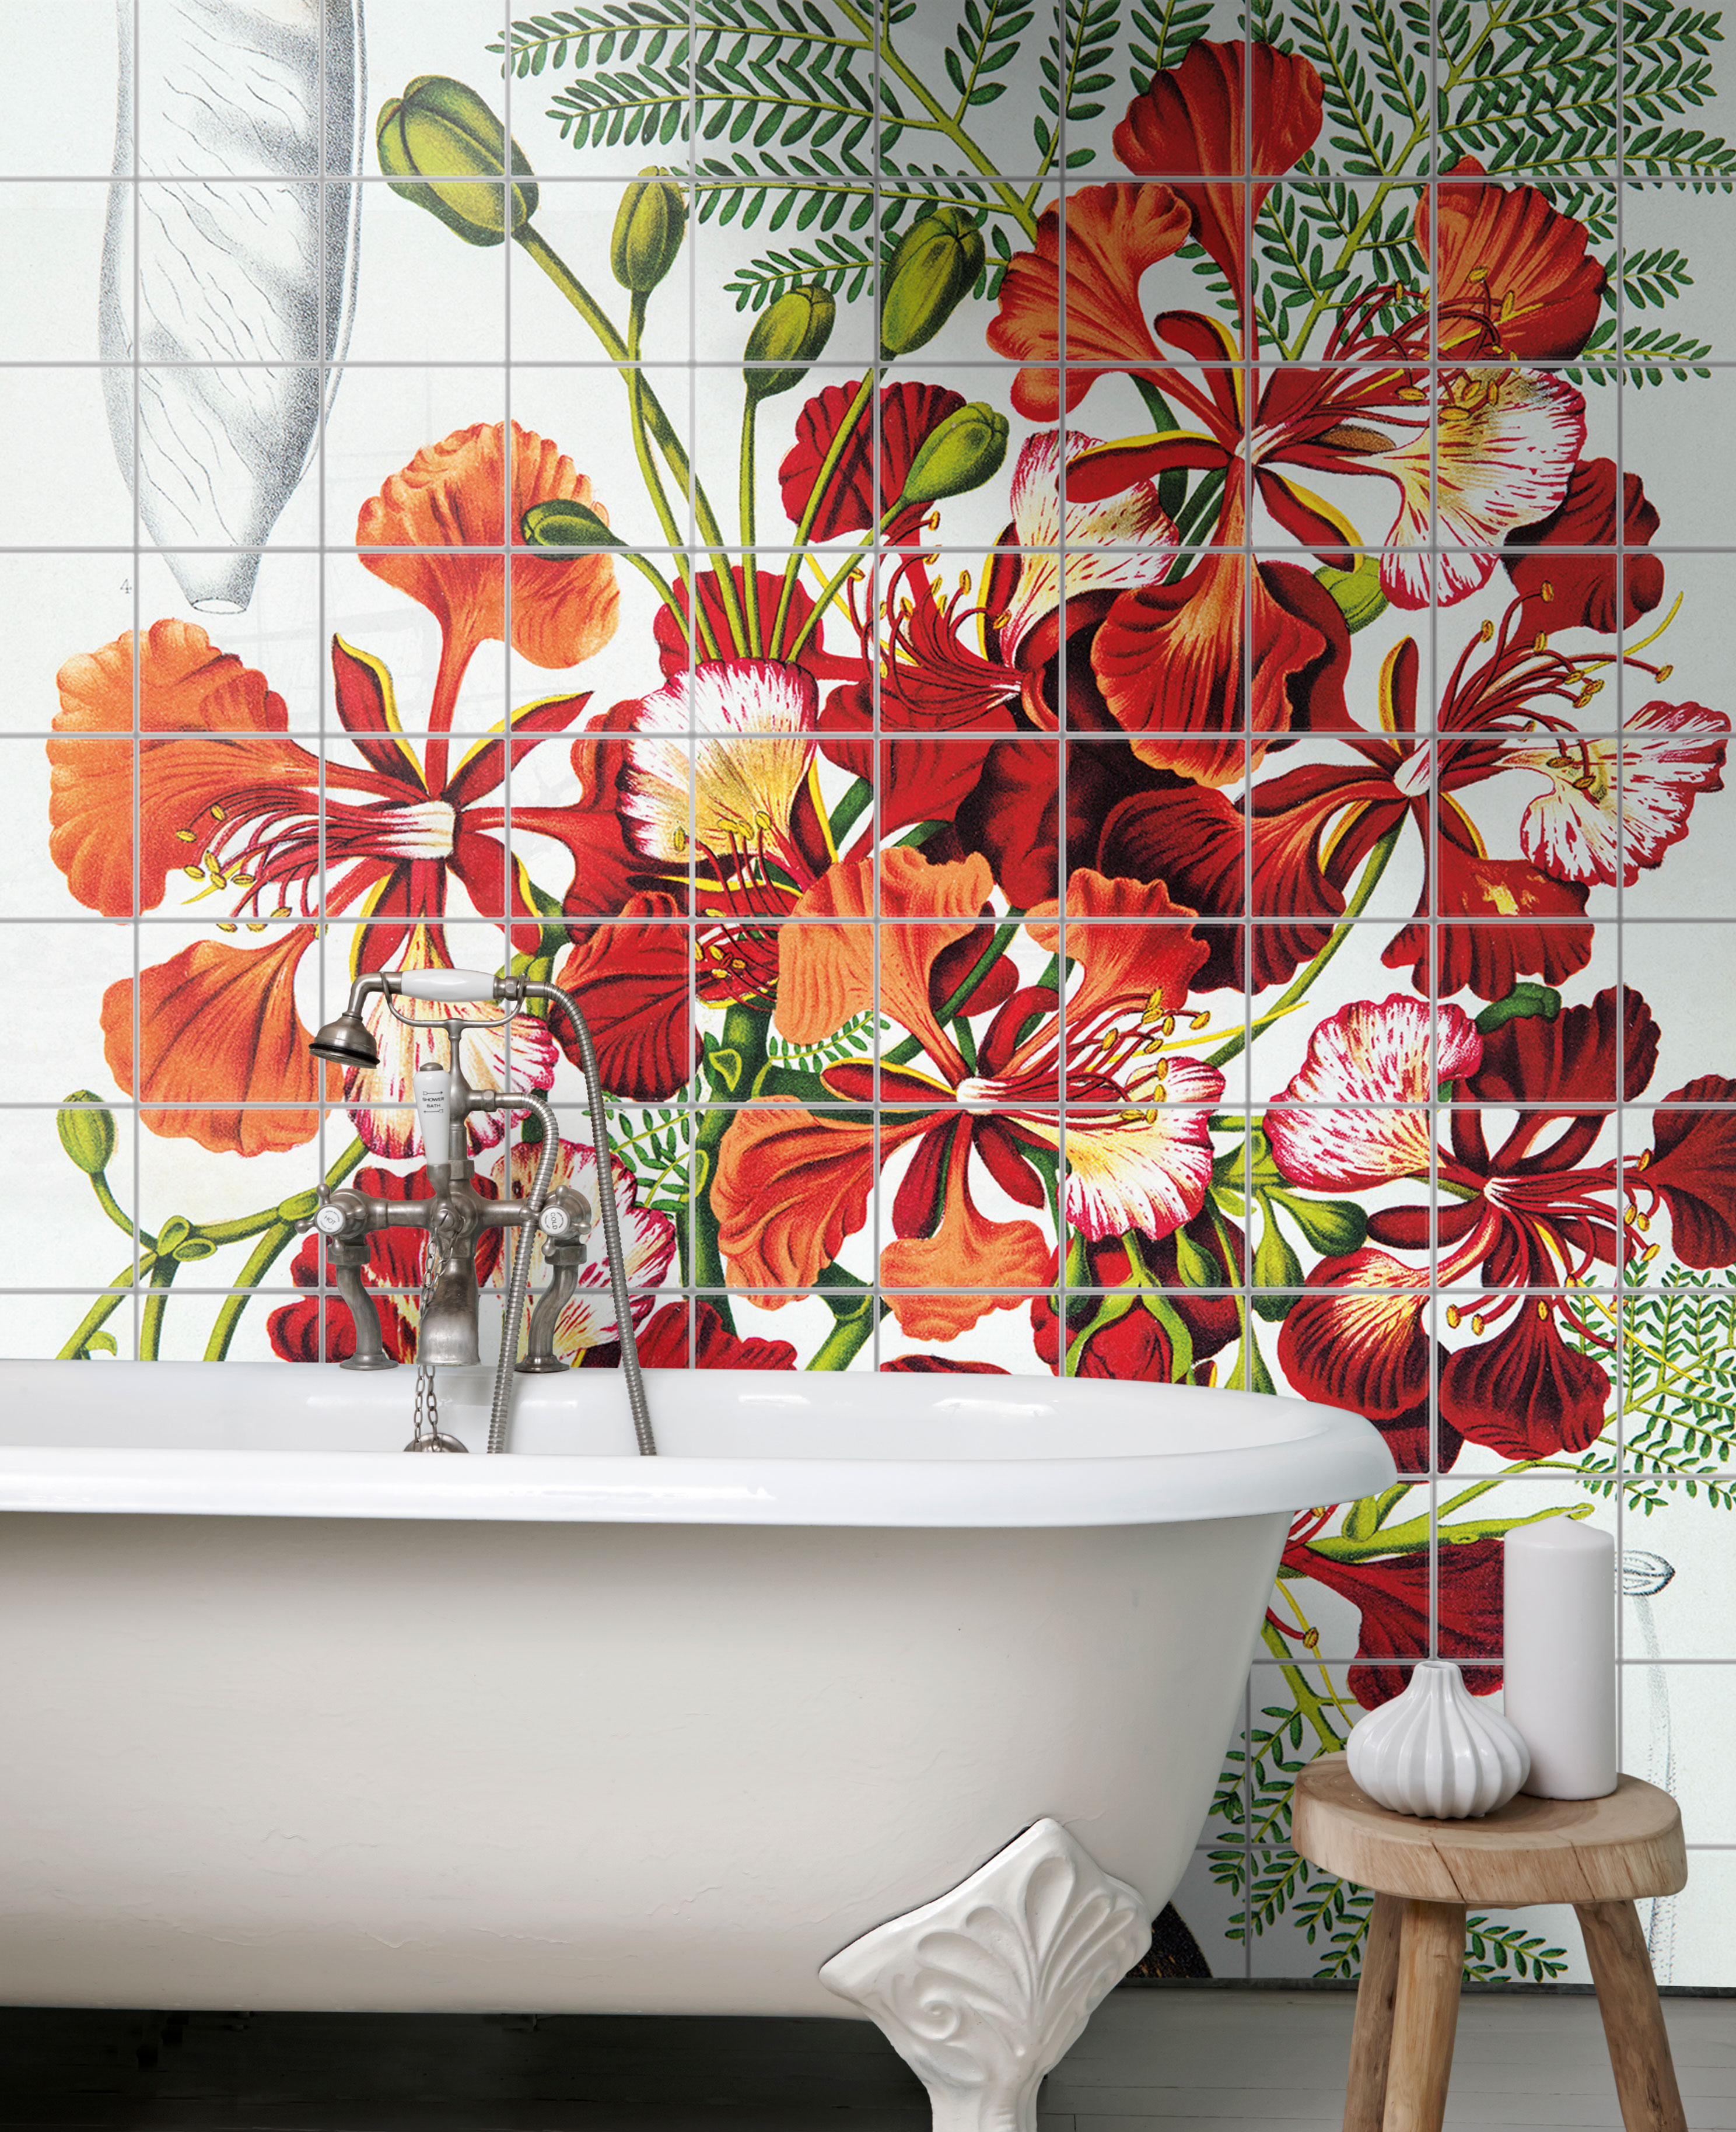
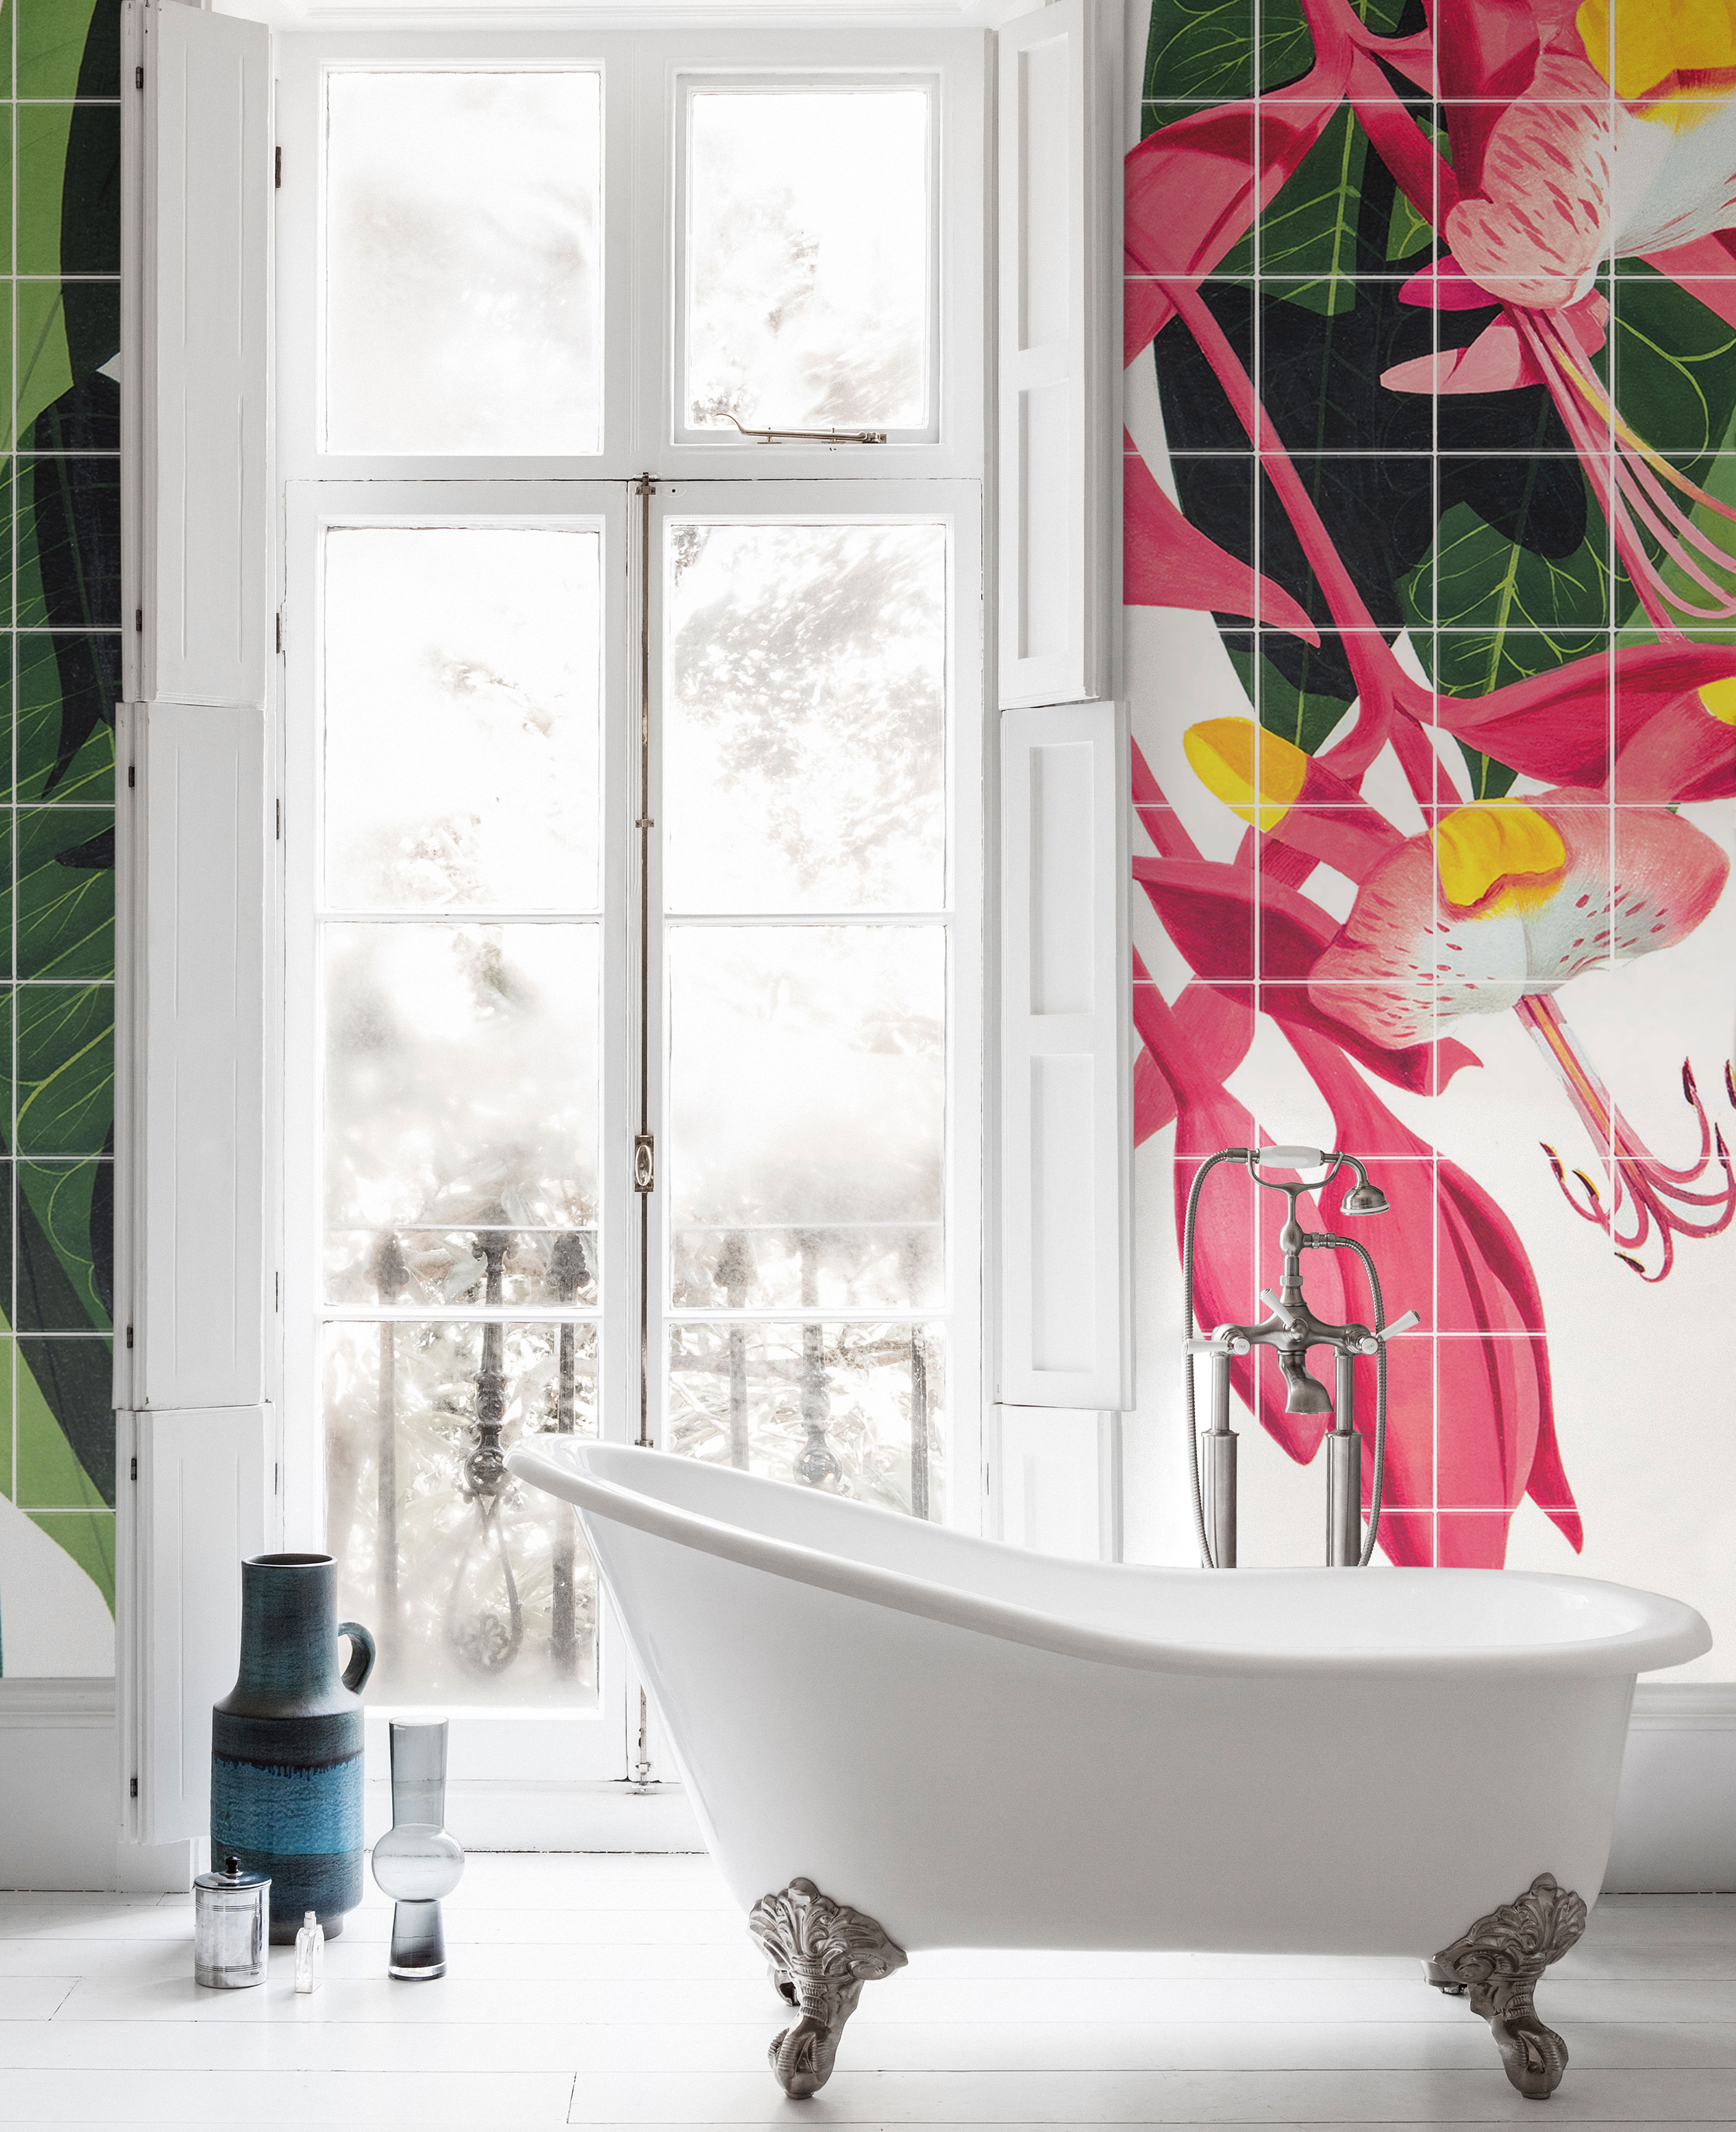
Every ceramic tile mural is made to measure. Customise your mural dimensions, image crop and choice of tile sizes.
Fusing traditional ceramic techniques with the latest digital innovations, we ‘high fire’ your choice of image onto quality ceramic wall tiles. Ideal for introducing imagery and decoration to tiled areas to create unique feature walls, our ceramic tiles are suitable for both homes and public spaces.
Tiled wall murals are available from 1000mm x 1000mm. There is no limit to the maximum size however sometimes we may get in touch if we feel the quality of the image is becoming compromised due to the size of the tile mural. All our wall tile murals retain the character and age worn beauty of the original image.
Our tiles conform to British Standard EN 14411: 2003
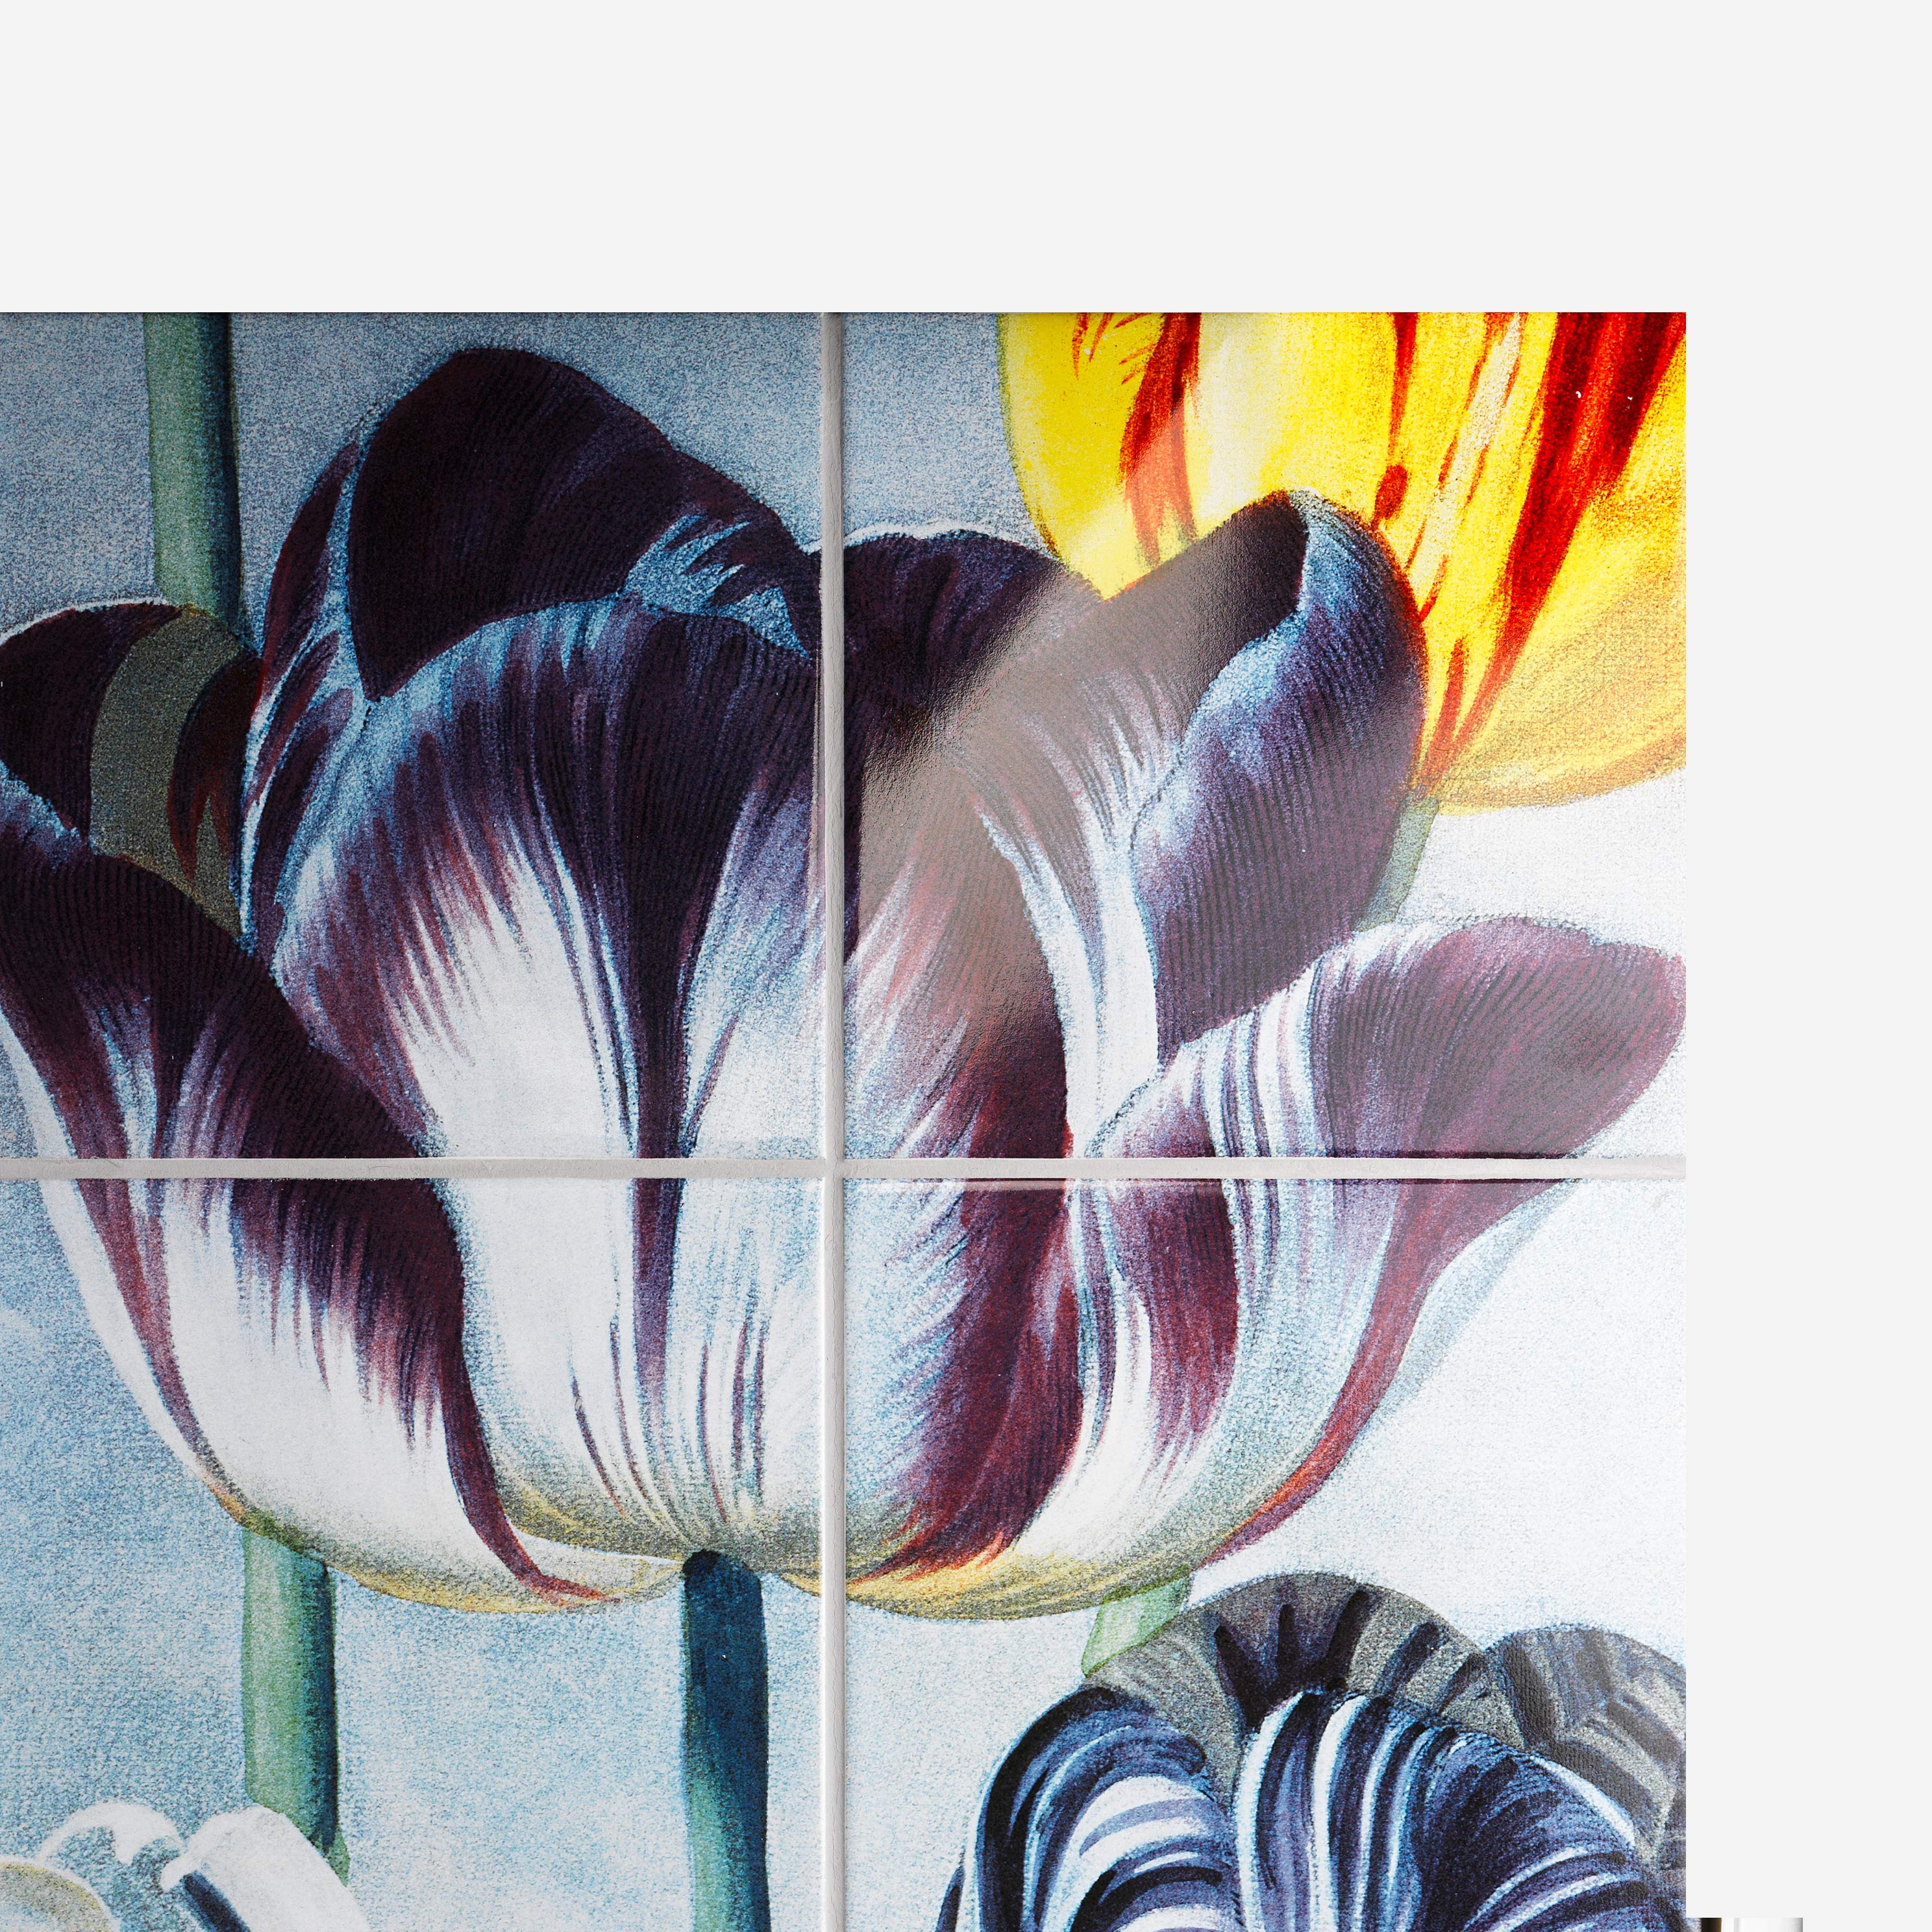
Tile Sizes
Tiles are available in two sizes: – 150 x 150mm and 200 x 200mm. These measurements are inclusive of the British standard 3mm grout line. For the individual tile size deduct 3mm. Due to the handcrafted process, there may be a + 1mm tolerance between individual tiles.
If you are planning on a smaller grout gap, please get in touch and we can advise the quantities needed.
In most cases the tile size you require will depend on your design, but it’s also worth considering the following. The smaller the tile, the easier it will be to lay on uneven walls. For large tiles you need your wall to be as flat as possible. For tiling around a shower area, we recommend using larger tiles - less grouting means less water damage.
Finish
Our traditionally fired tiles, are available in a classic gloss finish.
Shipping
Tiles are printed and fired to order, made to measure and supplied in around 30 working days, securely boxed.
For orders in the UK: £15 shipping cost for all orders under £150. For all orders over £150, shipping is FREE.
For orders in Europe: €20 shipping cost for all orders under €175. For all orders over €175, shipping is FREE.
For orders outside the UK & Europe: $30 shipping cost for all orders under $200. For all orders over $200, shipping is FREE.
However, if shipping internationally additional charges may be incurred due to size/weight.
To help track the progress of your Surface View product we provide an email receipt with your order, personal confirmation and tracking details of your dispatched product.
How to
How to measure:
As walls are seldom perfectly square always measure the height and width of your wall in several places. For large wall areas take measurements at 1 metre intervals. Take the larger of your measurements for height and width to make sure the tile mural will fit your wall area. We will print your chosen image to these measurements. If your dimensions do not fit perfectly within a multiple of your chosen tile size we will print sympathetic bleed on the remainder of the tile for you to cut back to your specified measurements.
Note: As our tiles are all made to order, and the firing process can make it difficult to ensure a perfect colour match between two different production runs we recommend you only trim tiles if you are experienced and confident not to break them.
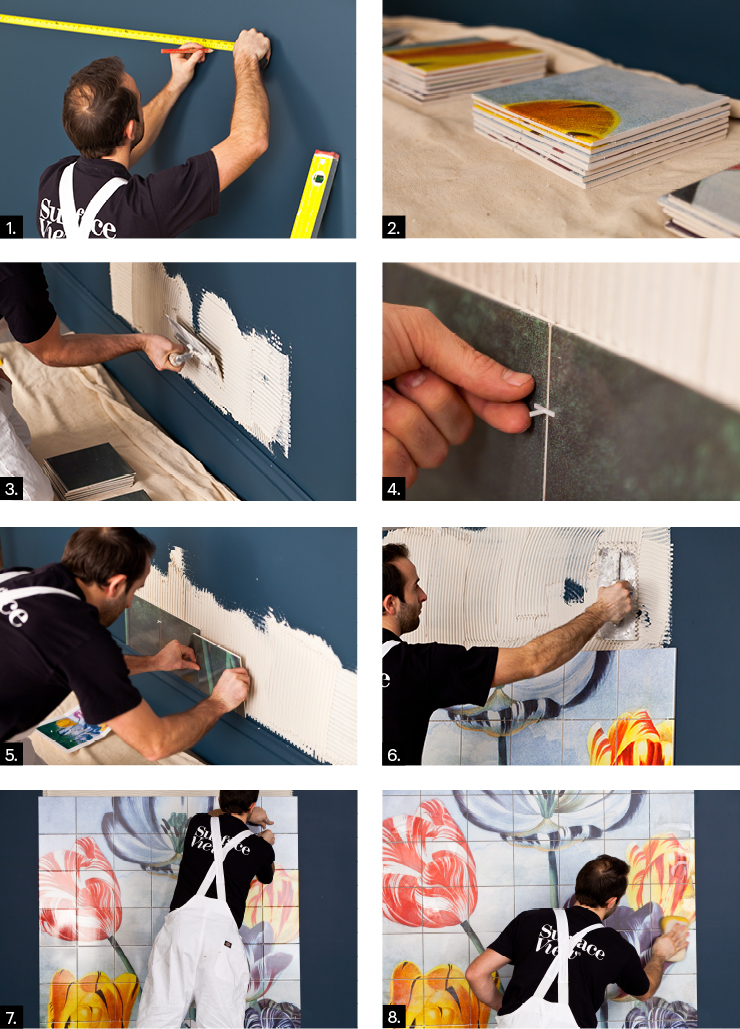
How to install:
Our ceramic tiles are installed like any other ceramic tile using tile adhesive and finished with grout.
We recommend that you use a professional tiler to install your ceramic tiles using conventional tiling methods.
We also have some professional guidelines and trade secrets here which you can also download as a pdf.
Professional Installation Guide
Grout and Adhesive
We recommend using powdered adhesive to install your tiles. However, you have a short working time with powdered adhesive, usually about 30 mins, after which time you need to discard the current batch and mix up a new one. Pre-mixed tub adhesives will work but it’s worth choosing a premium brand like BAL.
A 20kg bag of adhesive will tile around 4-5 sq metres
A 16kg tub of pre-mixed will tile around 3-4 sq metre
Whether you decide to use powdered adhesive or pre-mixed adhesive you should ALWAYS use a powdered grout. Note: there is a popular misconception that grout is waterproof and that it will not let water through. This is generally incorrect (speciality grouts can be waterproof but general use grouts are not). Grouts for regular use may say “waterproof” or “water resistant”, but this simply means that it is suitable for areas that get wet, in other words, once wet the grout will not deteriorate into mush.
Grout coverage will vary greatly depending on the grout joint width and the size of tile you are using. As a rough estimate, work on 3.5m2/kg, so an area of 20m2 should need about 6kg of grout.
Primers
Generally, the tile adhesive you buy will advise what type of primer you should use on your wall before installing the tiles. Follow the adhesive manufacturer’s advice, especially when installing the tiles in a wet environment.
Laying out
You will have already defined the layout of your tiles when you place your order. To help with installation, each tile is labelled on the edge with the row and column placement.
Make sure that your start point allows enough space for your image to sit within the wall. A 3mm grout allowance will have been factored in to the production of the tile mural. Mark your start line with a soft pencil.
Grout gaps
We have gaps because tiles will expand and contract to some degree, depending upon temperature and moisture. Grout is more compressible than your tile so will allow for this movement. If no (or very small) gap is left then you risk chipping to the tile edges or the tiles could even “tent” away from the wall. You wall tile mural has been designed with a 3mm grout gap so make sure you use 3mm tile spacers to ensure the image displays as designed on you finished mural and that it fits the dimensions you have given.
Fixing tiles
Now the fun starts. You need a level base to start tiling from, such as a length of batten nailed to the wall. Make sure that it’s straight and dead level. If using powdered adhesive, mix it in a bucket; add about 65mm of water then add the powdered adhesive. Don’t be nervous about adding quite a bit of powder in one go, it should mix in quite readily. You can pick up a small paddle mixer cheaply from a decent builder’s merchant - this makes mixing very easy. Keep adding the adhesive and mix until it turns to the consistency of smooth peanut butter.
Now apply your adhesive (either pre-mixed tub adhesive or the stuff you’ve just mixed up) to the wall with a trowel. A 6mm square notched trowel is standard for regular wall tiles. How much adhesive you should apply will depend on how fast you can tile. Pre-mixed tub adhesive can skin over quickly so once it’s on the wall, don’t hang about or your tiles won’t stick properly. You need to make sure that the ribs left by the trowel are horizontal and equal in size.
Now you can start fixing tiles. Sit the bottom of the tile on the batten and then stand the tile up so that it’s parallel to the wall. Now apply moderate pressure evenly to the tile, enough to squash the adhesive behind so that the ribs flatten out and make a solid bed. Fit the next tile and stick one of the prongs of a tile spacer in the gap in between. Wipe off any adhesive that’s standing proud of the joint. Continue this process until you reach the last full tile before the edge of the wall. Cut the last tile, apply adhesive to the back of it, then stick to the wall.
There’s not too much else to it - tiles should be cut around windows and other obstacles but fixing them is the same process
Cutting tiles
Tiles can be cut quickly and easily using a decent quality tile cutter. Please make sure you are confident in cutting tiles before you cut a tile mural tile as replacements may not be a perfect match due to the hand crafted and bespoke nature of our tiles and will take approximately 30 working days to arrive.
Grouting
Remove all the tile spacers that should be sticking out all over the walls. Using an old chisel (or similar tool) remove any lumps of adhesive that are proud of the joints. Mixing grout is easy: get a tub (a paint kettle is ideal), pour 20mm of water in the bottom, then add the powder a bit at a time. As with powdered adhesive you can us a paddle mixer for large quantities. Keep adding the grout powder and mix until it turns to the consistency of smooth peanut butter.
Pour the grout mix into a paint roller tray and work from that. Load an amount of grout onto your grout float and apply it to the tile joints so that it goes right to the bottom of the joint. Your float should be held at around a 45° angle and you should apply the grout diagonally to the joints so that you only wipe off the excess. The tile face should be fairly free of grout at this stage, but if not it’s not the end of the world. If after about 15 mins you haven’t used all the grout, stop what you’re doing and lightly wipe the face of the tiles with a damp sponge. (Wear gloves because it’s hard on your hands). You’ll need to keep rinsing the sponge often. The tiles you’ve grouted so far should be free of any lumps of grout and reasonably clean.
Expect a thin slurry of grout to remain on the tiles at this stage. Now continue to grout where you left off. Continue this process until you’ve done all the tiles, stopping every once in a while to give all the tiles a wipe over. If you leave the grout on too long, you’ll have a tough job to remove it. You can give the tiles another light sponging now. Then leave alone for a couple of hours. A misty coat of grout will remain on the tiles, and this can be dusted off when the grout is dry after around 5 hours. Wear a dust mask for this. You will probably have to dust/wipe the tiles a few times to remove the powder fully - this is quite normal.
Applying silicone
Here’s a fool-proof method that gives a perfect finish. Clean and dry the area using methylated spirits. Mask off a straight line (top and bottom of the joint) using either masking tape or electrical tape (electrical tape sticks to tile better than masking tape). Fill the bath with cold water to weigh down the bath. Apply a bead of sealant to the joint then run along the bead with your finger in one continuous movement. You now have the perfect amount of silicone for the seal. Remove the tape as soon as you’ve done this. When removing the tape, you’ll have pulled the edge of the seal a little, so you need to go over the whole seal again with a wet finger. You should now have a perfect seal around your bath/shower. Drain the water from the bath after around four hours when the sealant has gone off.