Every window film is made to measure from a curated selection of images, with your choice of clear or frosted finishes.
All our window films are made to measure and made to order. You can customise your size, crop and finish and select from a curated range of images carefully selected for glazing.
All our window films are easy to apply and can be removed without leaving any permanent adhesive residue on your glazing. Available from 1000 x 1000mm (40”), our window films will be supplied in 1200mm wide sections.
Whilst window films are ideal for creating privacy within a bathroom, we wouldn’t recommend these graphics for a shower cubicle.
Finishes
Our window films are available in two finishes.
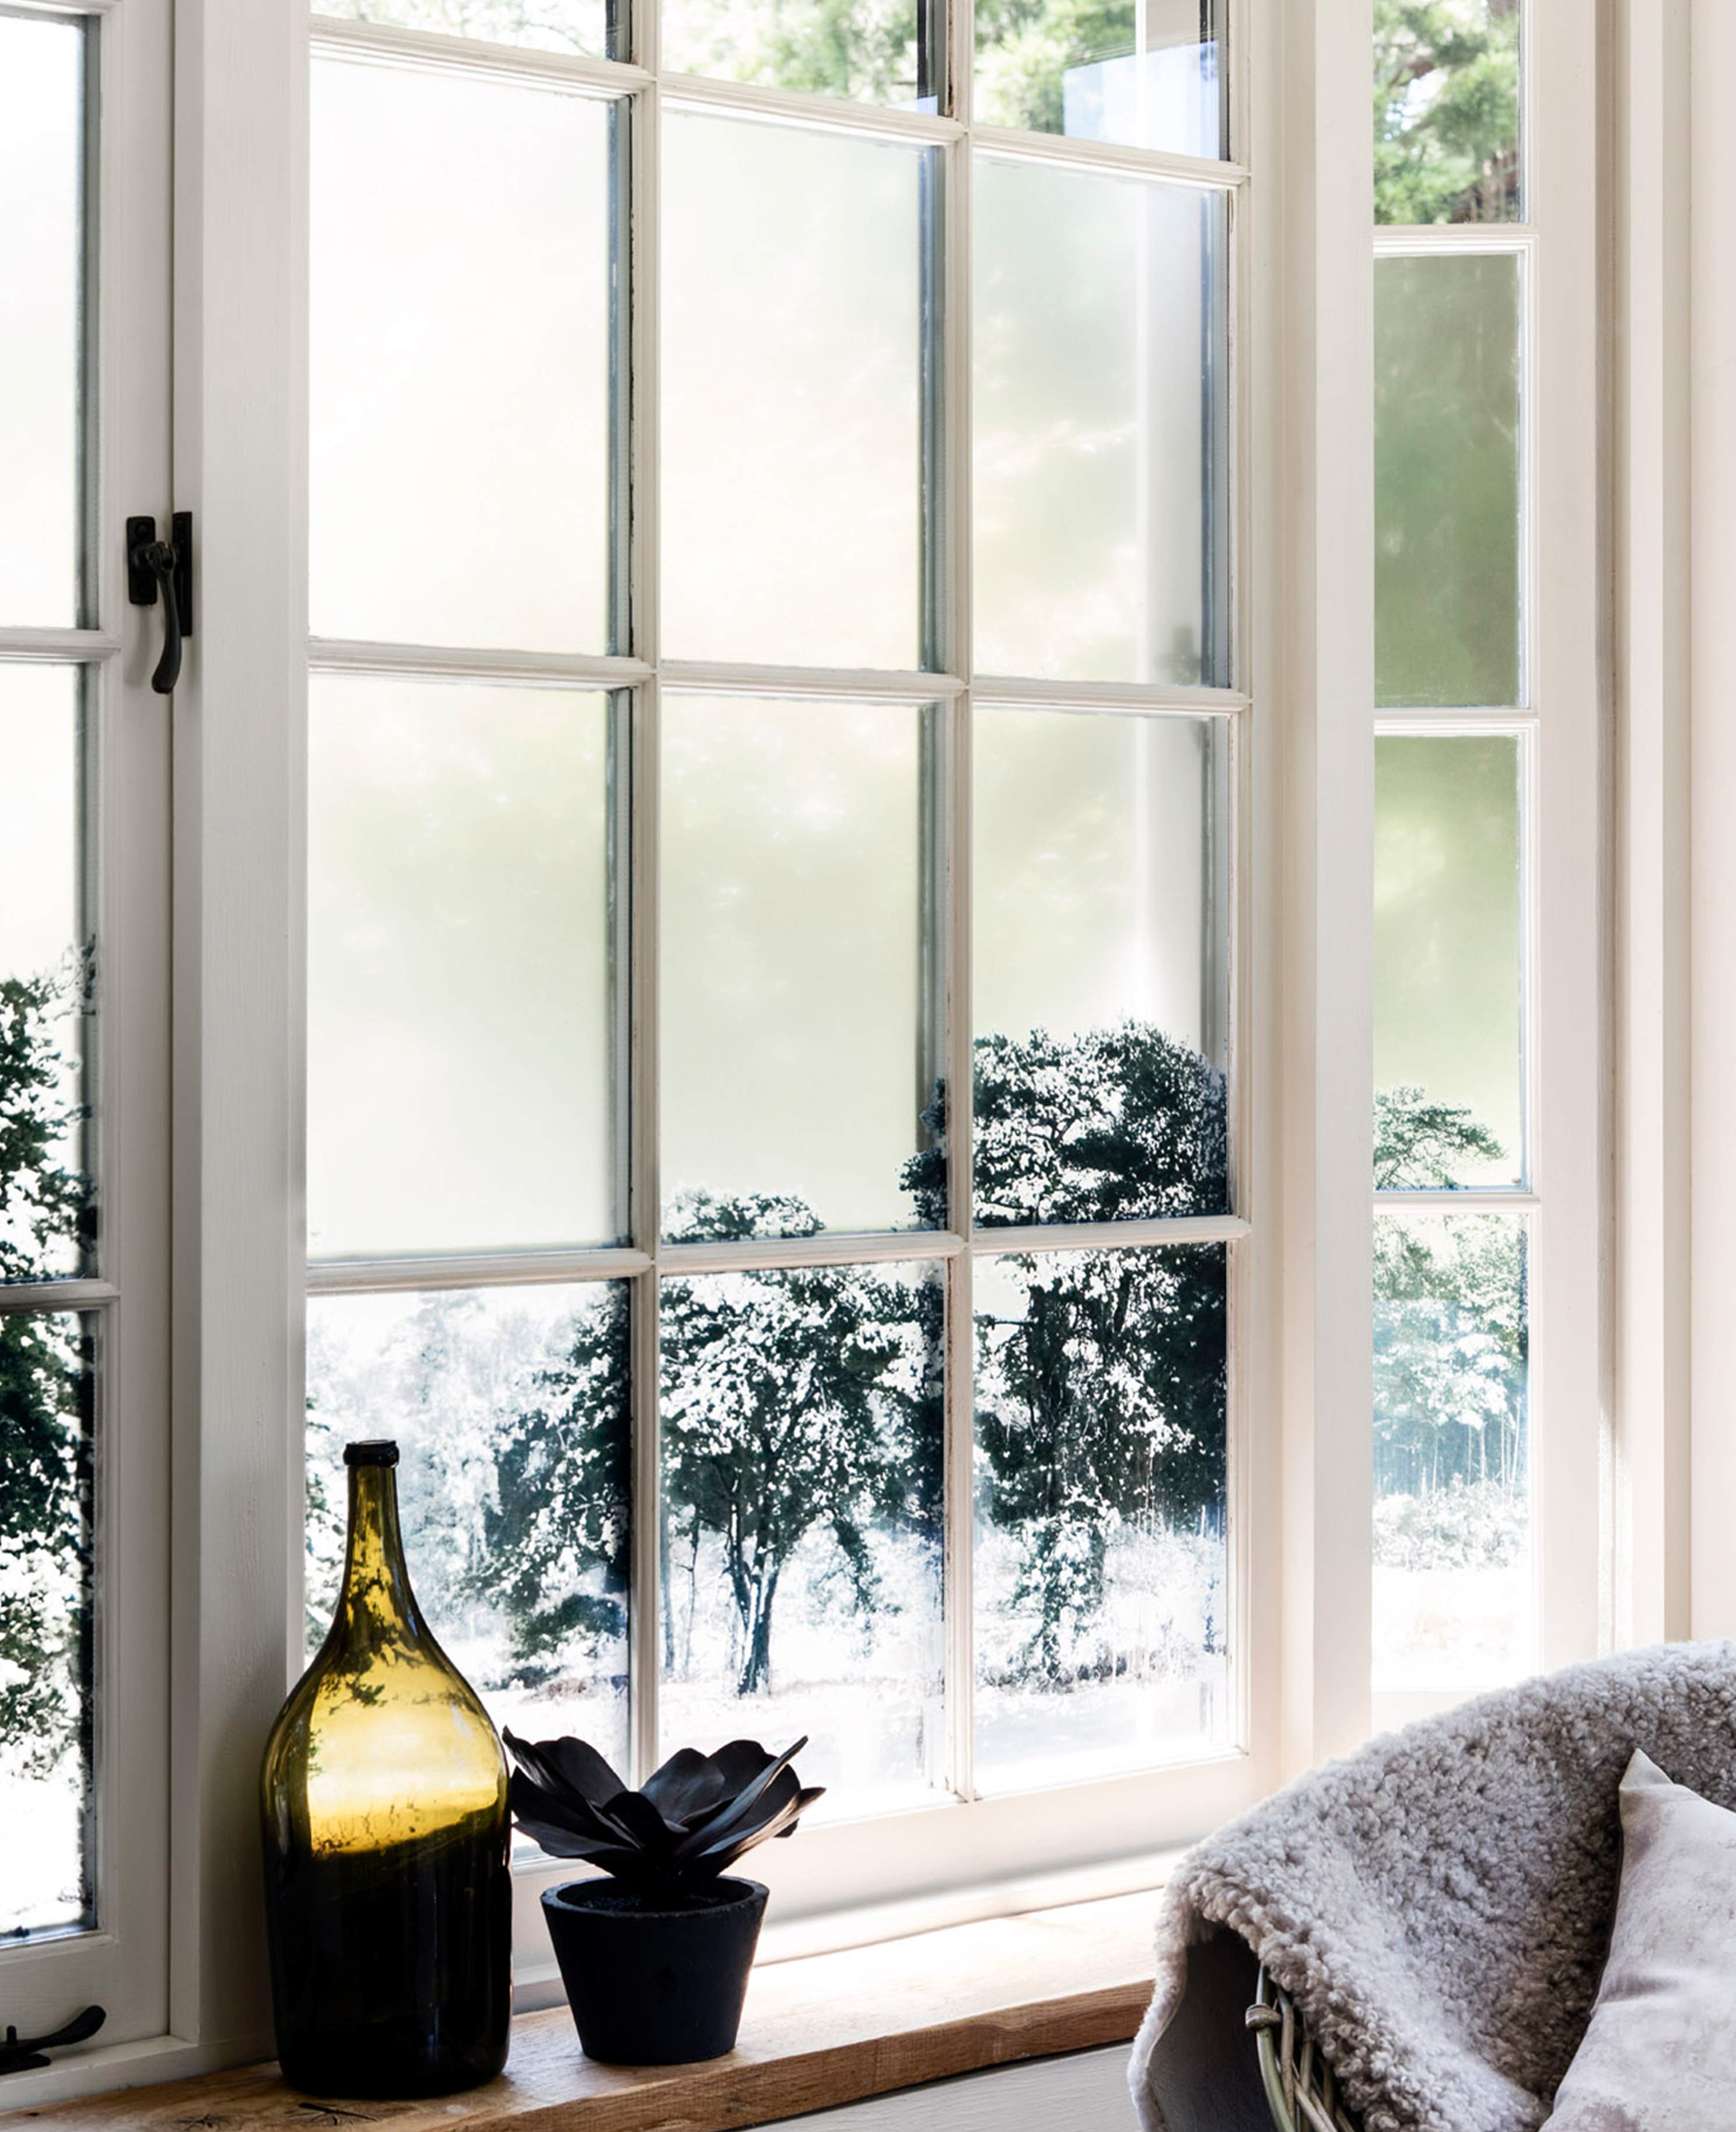
Frosted
This window film diffuses light and provides greater privacy. It can be used on all internal glazing and on the interior surface of windows and glazed doors.
Clear
A window film specially developed to retain the clarity and visual crispness of a clear window.
 Frosted
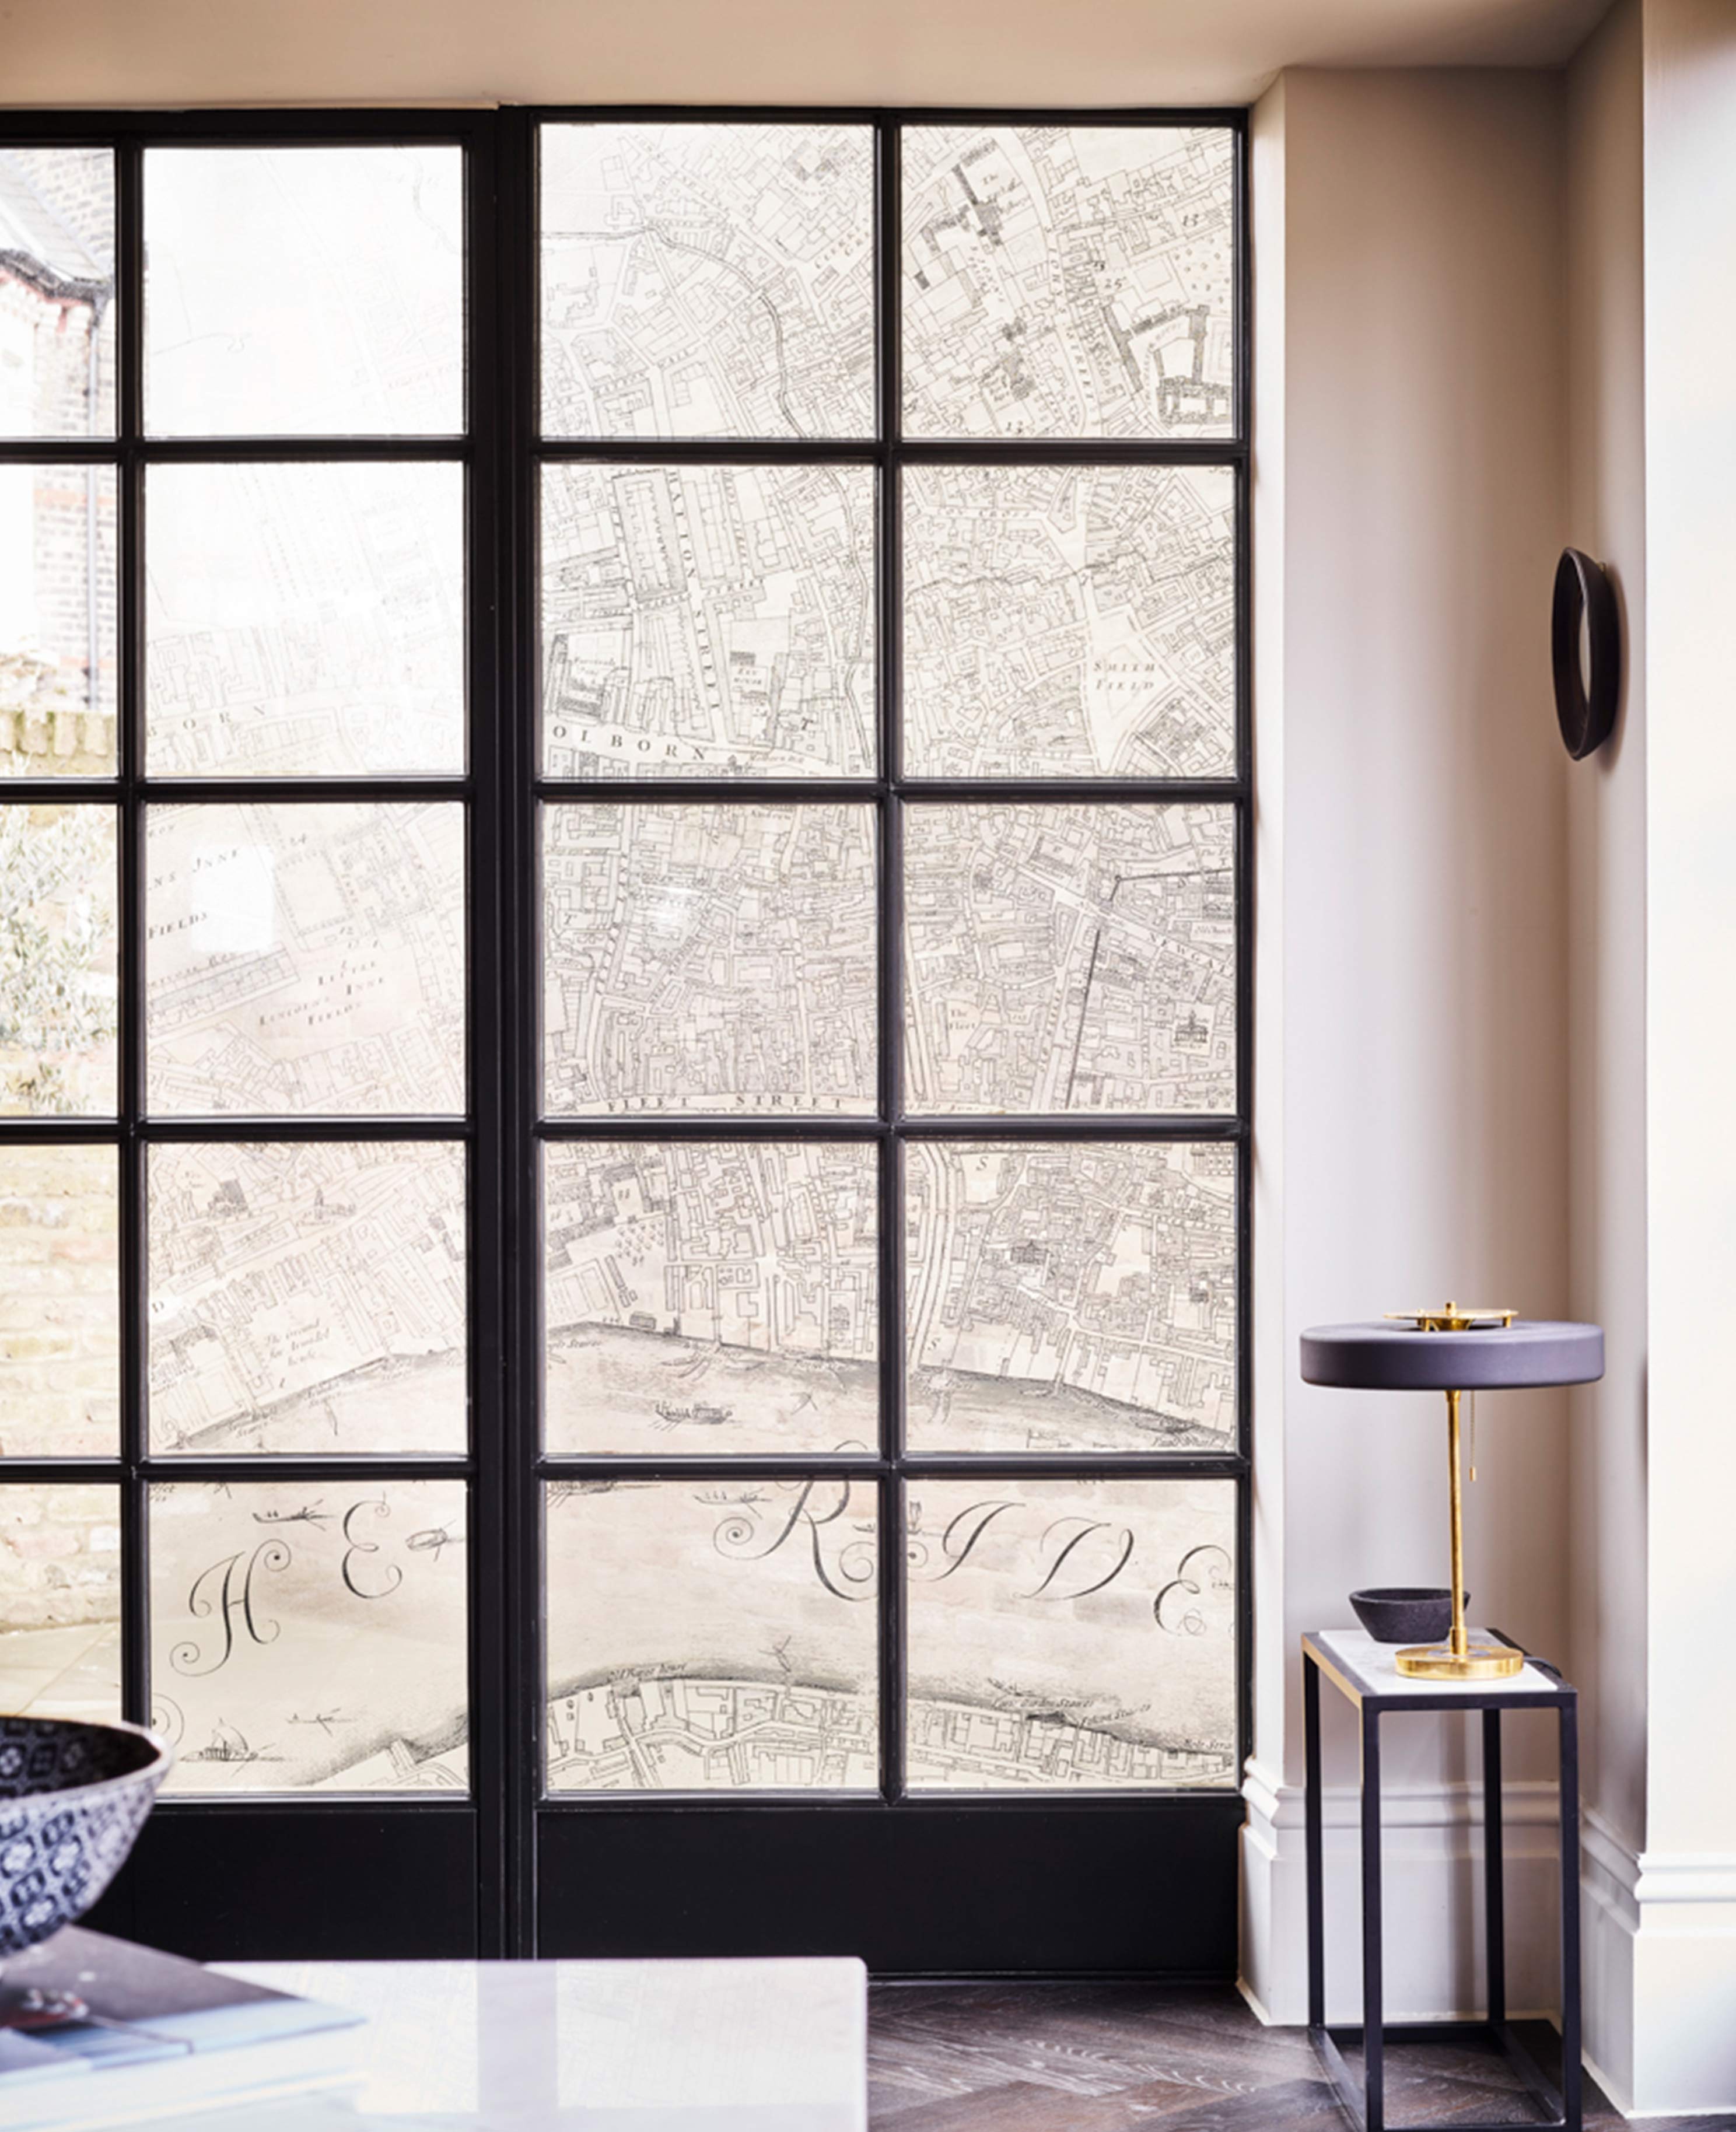
 Designs
We use a select range of images that we know work well for glazing. Our colour designs use images chosen for their vibrancy, creating real impact on internal glazing or windows. We have also created white and grey effect designs. Our white effect designs create an etched glass look which is very popular. Our grey effect designs are printed in a single subtle grey and favoured by interior designers and architects.
If you require an image other than the ones we’ve recommended, please contact us and we’ll advise whether it’s suitable as a window film.
Shipping
Our made-to-measure window films are supplied within 12 working days, packed rolled together with full application instructions.
For orders in the UK: £15 shipping cost for all orders under £150. For all orders over £150, shipping is FREE.
For orders in Europe: €20 shipping cost for all orders under €175. For all orders over €175, shipping is FREE.
For orders outside the UK & Europe: $30 shipping cost for all orders under $200. For all orders over $200, shipping is FREE.
To help track the progress of your Surface View product we provide an email receipt with your order, personal confirmation and tracking details of your dispatched product.
How to
Measure up
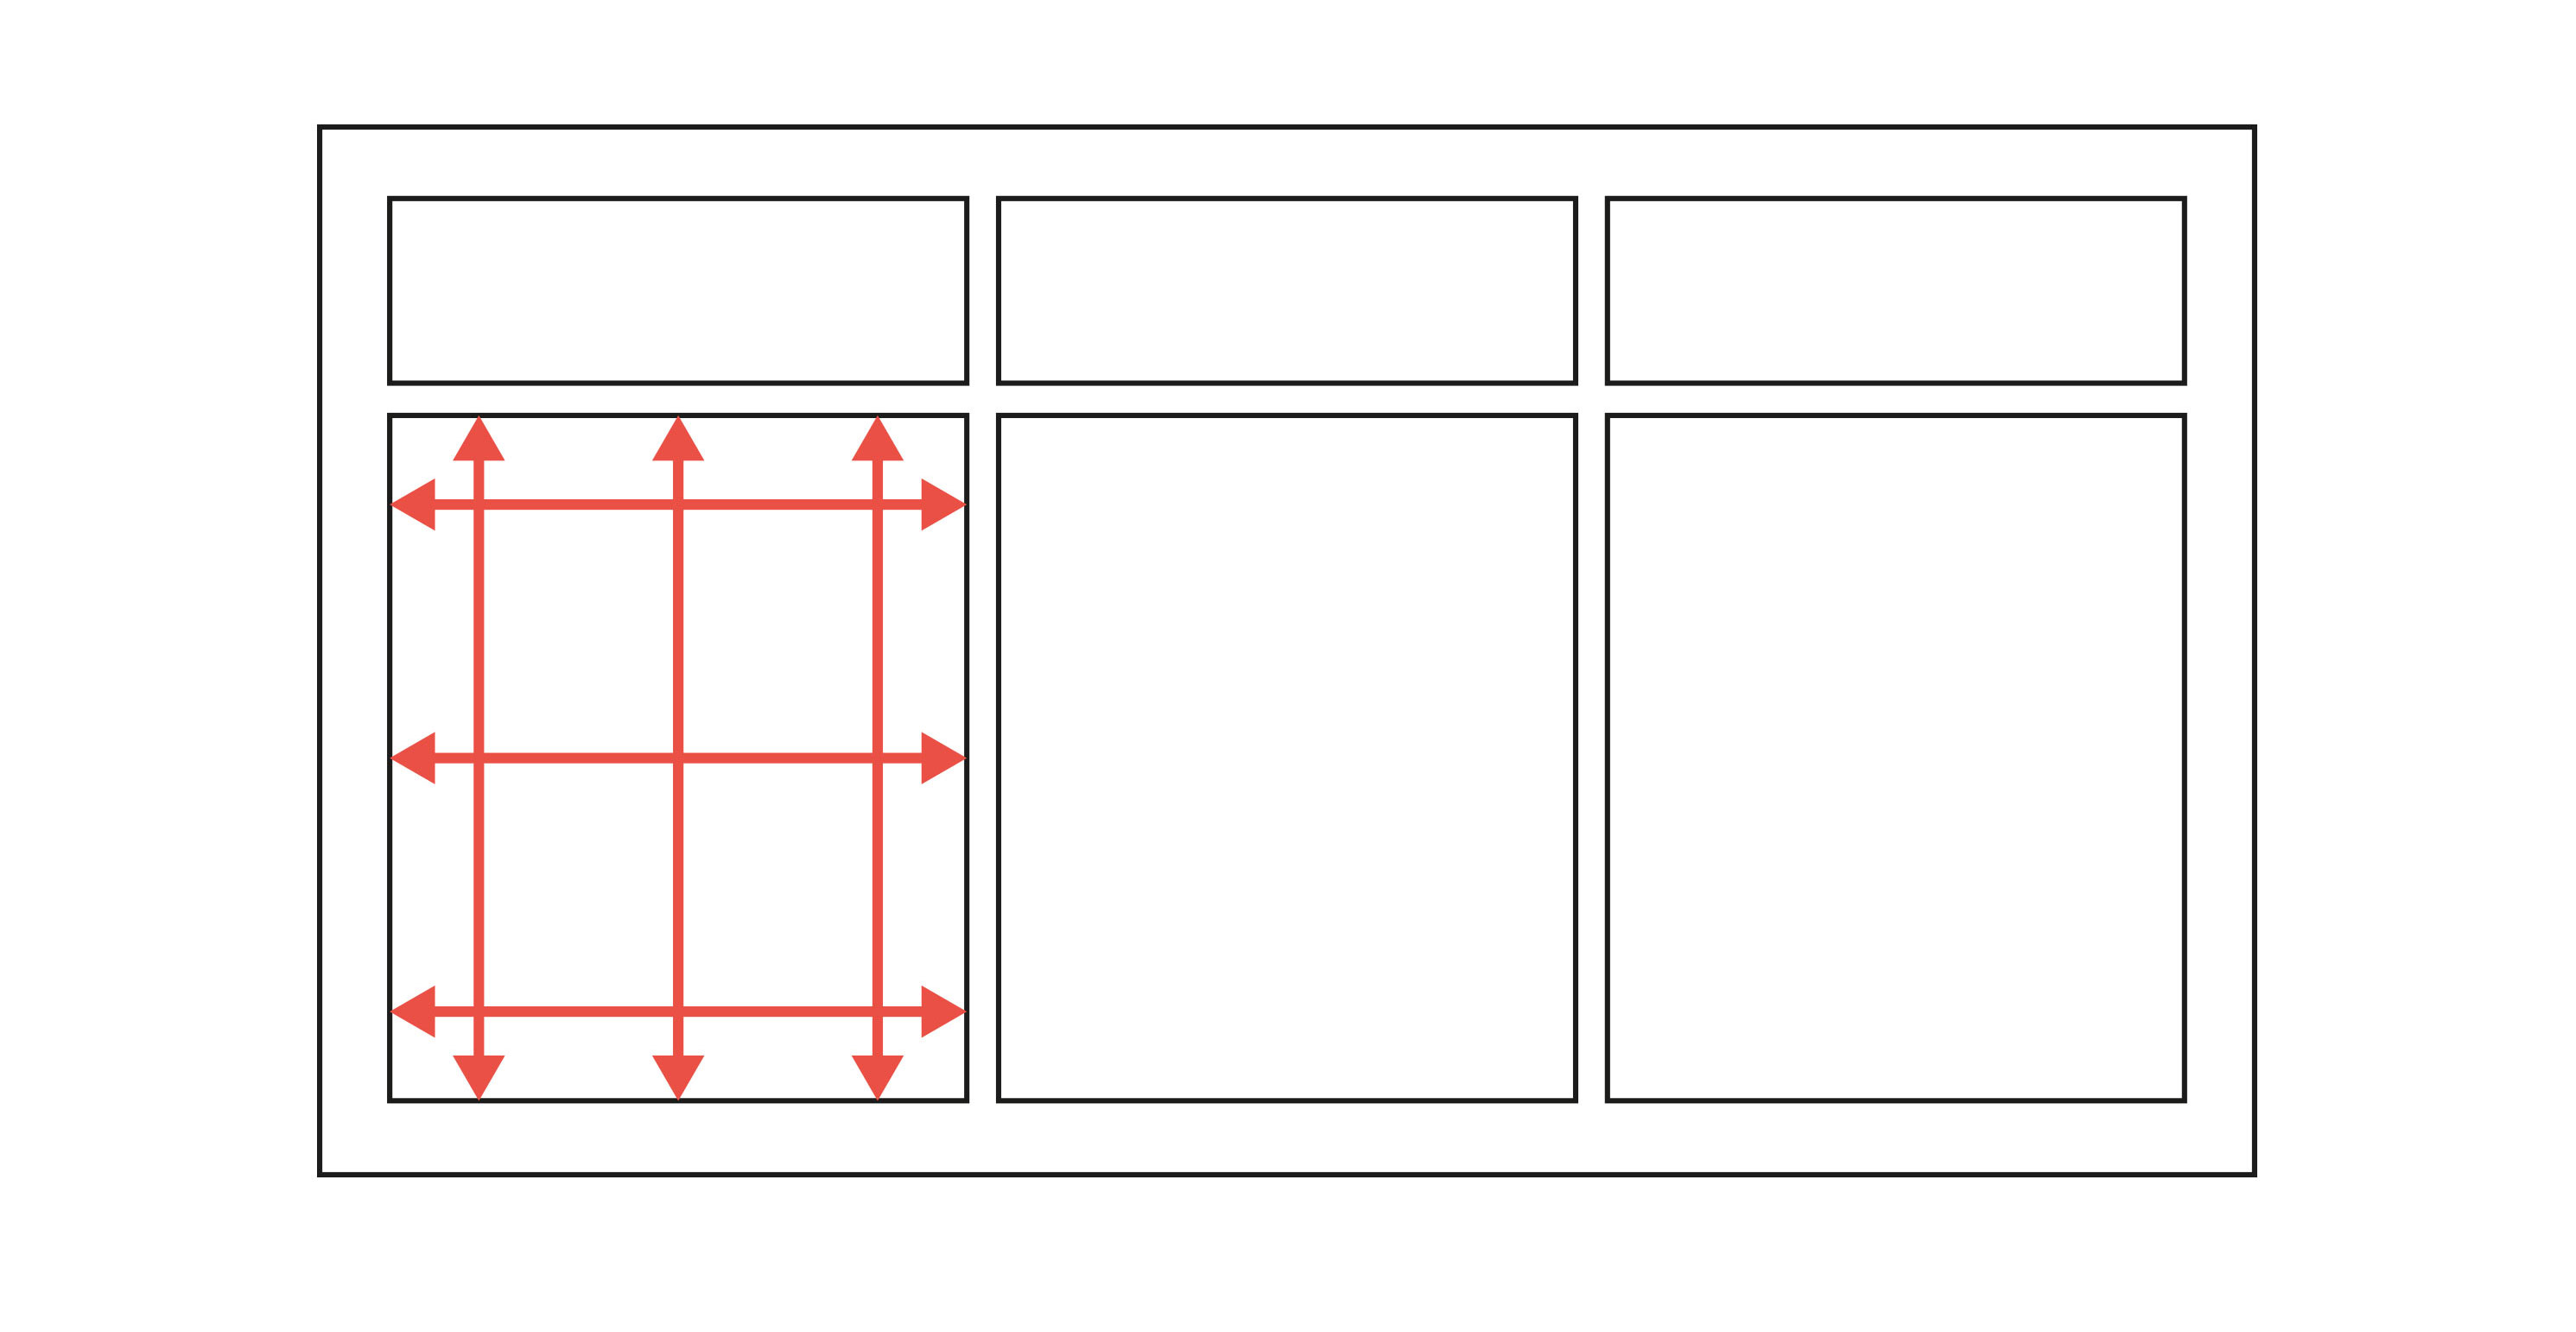
Measure the width of the glazing in your window or your glass panel. As windows are rarely perfectly square, always take measurements in a few different places: top, bottom and middle. Then measure the height of your glazing at each end and middle. See diagram below. If the measurements are not all equal, use the largest of your height and width measurements to ensure the window film fills the space. Always double check your measurements.
If the window film is to work over numerous panes please get in touch with detailed dimensions and we can provide your window film cut to the size of each pane. For classic multi-pane windows, measure the width and height of each pane, being sure to record the dimensions of each pane relative to the position of the pane in the window in case some panes are not equal sizes.
Installation Guide
Our window films are easy to install if you’re well prepared and read our installation instructions carefully. They are available here or you can also download as a pdf.
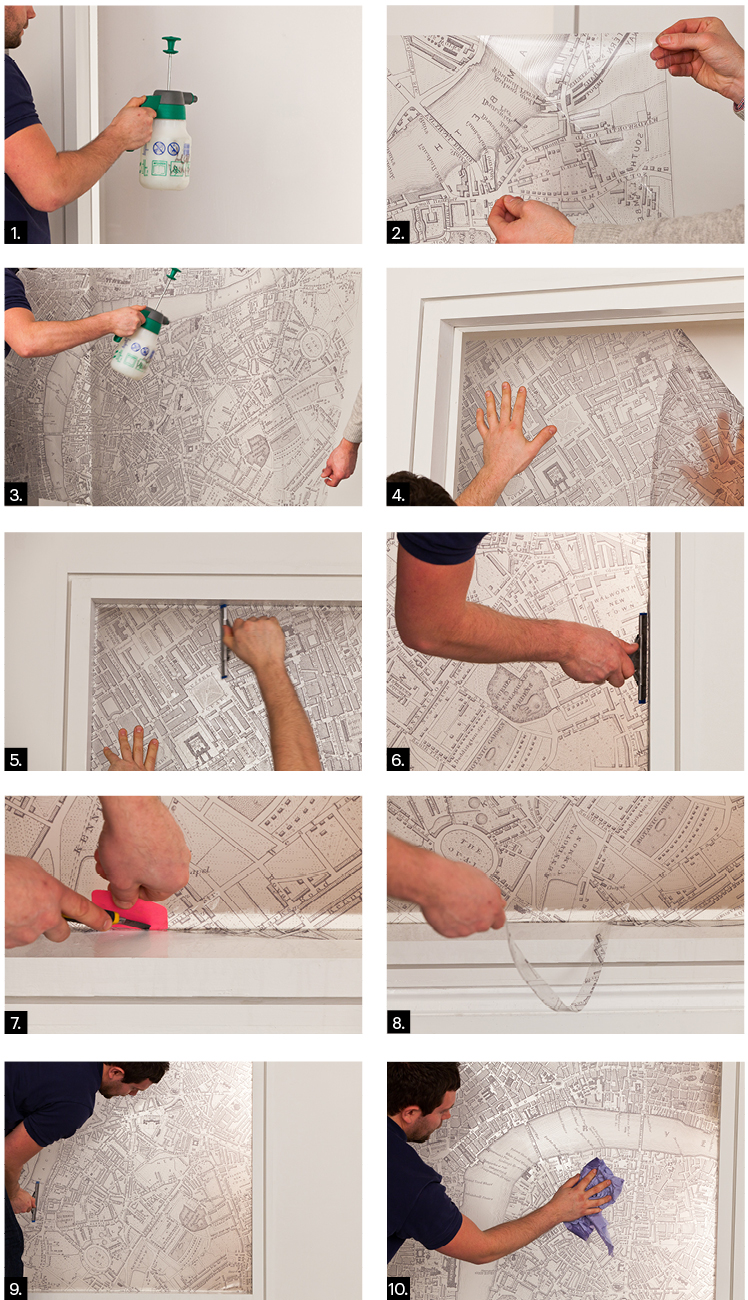
The key to installing your window film is scrupulously clean window/glass, plenty of application solution and a friend. Your glazing films need to be applied wet, as this wet application allows for repositioning of the film before it sticks to the glass. Once the adhesive has completely dried the graphic will be fixed in place. This usually takes 24 hours. You can clean the window film with warm water, but we wouldn’t recommend using abrasive cleaners.
Whilst window films are ideal for creating privacy within a bathroom, we wouldn’t recommend these graphics for a shower cubicle.
Supplied with your window film:
- Hard squeegee
What else you’ll need:
- Distilled water (in a spray container - for cleaning and application)
- Straight metal edge
- Trimming knife
- Low tack Sellotape (is useful)
- Paper towel or Soft sponge (a lint free towel is best)
How to install:
1) Before beginning. Ensure that you have enough space to carry out the application without damaging the window film. The glass and the film need to be kept wet so you may want to lay a towel or covering sheet to protect your carpets or flooring.
2) Clean the glass/window. Cleaning the window or glass is a very important step. You want to remove all dust and dirt particles before applying your Window film. We recommend wetting the glass with distilled water and cleaning completely at least twice before beginning the application process. Once you are satisfied that the glazing is free from debris than soak the area one final time.
Surface View Tip - Adding a drop of mild liquid shampoo/soap to each litre of distilled water in your spray solution allows the squeegee to glide easily over your window film and helps with removing the water from under your film after you’ve positioned it onto the glazing.
3) Remove the backing it's easier with a friend to help. Each film is coated with pressure sensitive adhesive which must be kept clean. The adhesive is protected by the backing which you have removed. Do not let the exposed adhesive touch anything but the glass onto which it is to be installed.
Tip - To help remove the backing release liner without touching the adhesive on the film you can use low tack tape on one side of an upper corner of the film. Place a second piece of tape on same corner on the reverse side of film. Be careful not to let the exposed tacky surfaces of the tape touch each other. Holding one piece of tape in each hand, pull the pieces of tape apart to separate the backing from the film.
As you pull the liner off the film, begin to spray the adhesive surface with your solution, completely soaking the exposed adhesive. Continue pulling down on the backing sheet while spraying the distilled water onto the adhesive. The distilled water will neutralise the adhesive, preventing it from sticking to anything. Try to pull the backing liner down evenly across the film. With the adhesive surface completely exposed, spray one final time with your water solution to ensure that 100% of the adhesive is wet.
4) Apply the window film. Hold the film at its uppermost corners, being careful not to allow the film to touch the floor or any other surface. Place the film on the window, with the adhesive side against the glass. The water solution acts as a lubricant making the window surface slippery. You can now slide the film so that the edges of the film fit neatly into the window pane, or glass panel. Lift and reposition the film, if necessary, to remove large wrinkles or bubbles.
Soak the surface side of the film facing you with distilled water. This acts as a lubricant for the squeegee.
Beginning at the centre of window, squeegee once to the right side of the window. Going back to the centre, squeegee across to the left hand edge of the window, then squeegee the window in straight, smooth strokes working from centre out to the edges of the window until all excess water solution has been squeezed out from under the film, and the film is lying flat. Remove as much water and solution from under the film as possible.
Note: The squeegee will not float across a dry surface. You can keep spraying the surface of the print with your solution to keep the surface wet.
5) Trimming. If any trimming is required butt your straight metal edge against the window frame, perpendicular to the glass.
With a trimming knife and new sharp blade, trim the excess film using the straight edge to create a narrow straight line border.
6) Final squeegee. Once the film is completely trimmed, spray the surface once more with application solution. Repeat squeegee operation as described in Step 4. Remember, the more moisture you can remove the better.
7) Wiping down. Finally, using a lint free cloth or soft sponge, gently wipe around the edges of the film to completely remove all excess water. This prevents the distilled water re-entering between the glass and film.
Additional notes for large glazing areas
Overlaps and cutting on multiple panel installations. Although most window films will be supplied as single panels, larger installations may consist of several ‘drops’ of a manageable size.
In this instance, the film will be supplied with overlaps to ensure that you can line up the printed image. Once aligned the right hand panel will overlap the left by 10mm. Whilst the adhesive on both panels is still wet we recommend that you use a straight rule to trim back both panels to a butt join. Once trimmed there will be an approximate width of 5mm of excess material from each panel that can be discarded.
Make sure that at the point where the film overlaps, the graphic image continues with accurate registration along the length of the overlap. To make sure that the splice on the two pieces of film butt properly against each other, use a metal straight edge as a guide and with a sharp fresh blade trimming knife slice lengthwise through the double thickness of film at centre of the splice.
Lift off the top cut strip of film at the splice and discard. Gently lift a corner of the top film, remove the second layer of film and discard. During this process spray lightly with solution under the film edge you have lifted.
Squeegee the joined areas to adhere the graphic, taking care not to squeegee across a splice.
Additional notes for multiple paned windows
If your window is made up of several panes of glass we recommend that prior to beginning the process you lay out the sections of window film on a clean flat surface making sure the pattern works across each section. Number each section so you will know which section is which when it comes to installation.
Once all sections are laid out follow the installation guide for each pane, one section at a time. Place the film in the centre of each pane and trim all sides.
How to Remove
Our window graphics can be peeled away like any normal sticker. Depending on how long the film has been installed, it may leave some adhesive residue which should be easily cleaned off with detergent.
If you have any questions about installation please contact us on 0118 922 1327 or [email protected]